Used Washers & Dryers in Citrus Heights: Top- vs Front-Load Guide (Fit, Hookups, Delivery & Warranty)
Buying used laundry units can save serious money and help you get running this week—not after a long backorder. The trick is knowing how to match fit and hookups to your home, which style actually suits your habits, and how to check a machine’s real condition in-store. This Citrus Heights–focused guide covers measurements, electrical/gas/venting basics, a buyer-friendly Top- vs Front-Load comparison, and inspection checklists so you can shop with confidence.
About the Author
Sayed Sadat is a senior appliance technician at City Appliances with 10+ years of hands-on experience installing and testing washers, dryers, and stacked sets across Citrus Heights, CA. He translates technician checklists into simple steps any shopper can use in-store.
Why Trust City Appliances
- Technician-tested inventory (spin, drain, heat, airflow, leaks)
- Same-/Next-day delivery when possible, with clear stair/long-carry rules
- Written warranty and in-store support—no “as-is” guesswork
Why buy used laundry? (Pros, cons, and who it’s for)
Pros: 40–60% savings vs new; faster availability; eco-friendly reuse; proven models with known parts.
Cons (and fixes): Unknown condition → test with our checklists; hookup confusion → measure and match (below); installation hassle → schedule delivery/haul-away with a local team.
Best for: families wanting bigger capacity on a budget, renters/ADUs needing stackable sets, emergency replacements after a failure.
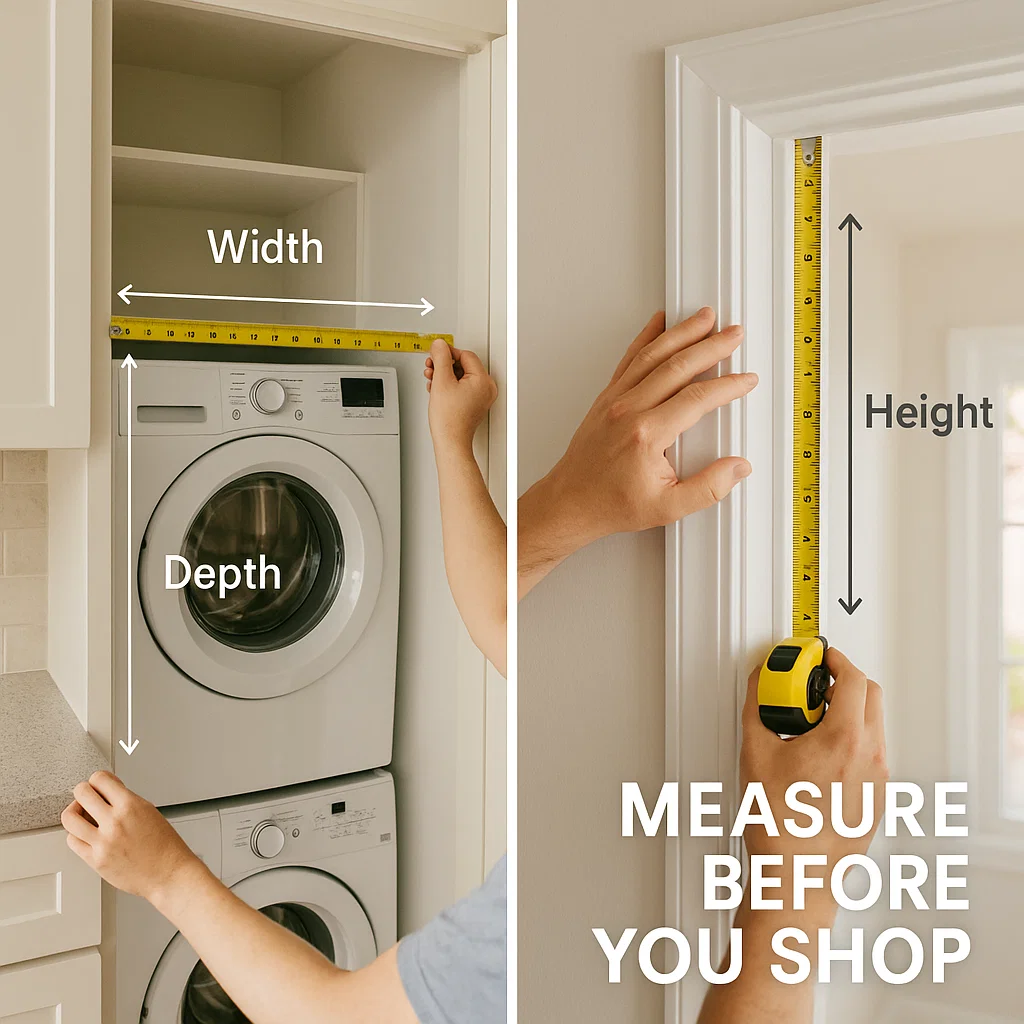
Fit & Hookups: what to measure before you shop
- Space & access:
- Laundry closet or room W × H × D, plus doorways/hallways/turns on the path.
- Stacked set clearance for doors and detergent drawer.
- Allow rear clearance for hoses/vent and front clearance for door swing.
- Laundry closet or room W × H × D, plus doorways/hallways/turns on the path.
- Washer connections:
- Hot/Cold water valves within reach; drain standpipe height ok (usually ~30–96″).
- Drip pan recommended for upstairs installs; accessible shutoff is a must.
- Hot/Cold water valves within reach; drain standpipe height ok (usually ~30–96″).
- Dryer power/fuel:
- Electric: 240V outlet; know your cord type (4-prong newer code vs 3-prong older—cords are swappable).
- Gas: dedicated gas line with shutoff; use a licensed pro for hookup; still needs 120V outlet.
- Electric: 240V outlet; know your cord type (4-prong newer code vs 3-prong older—cords are swappable).
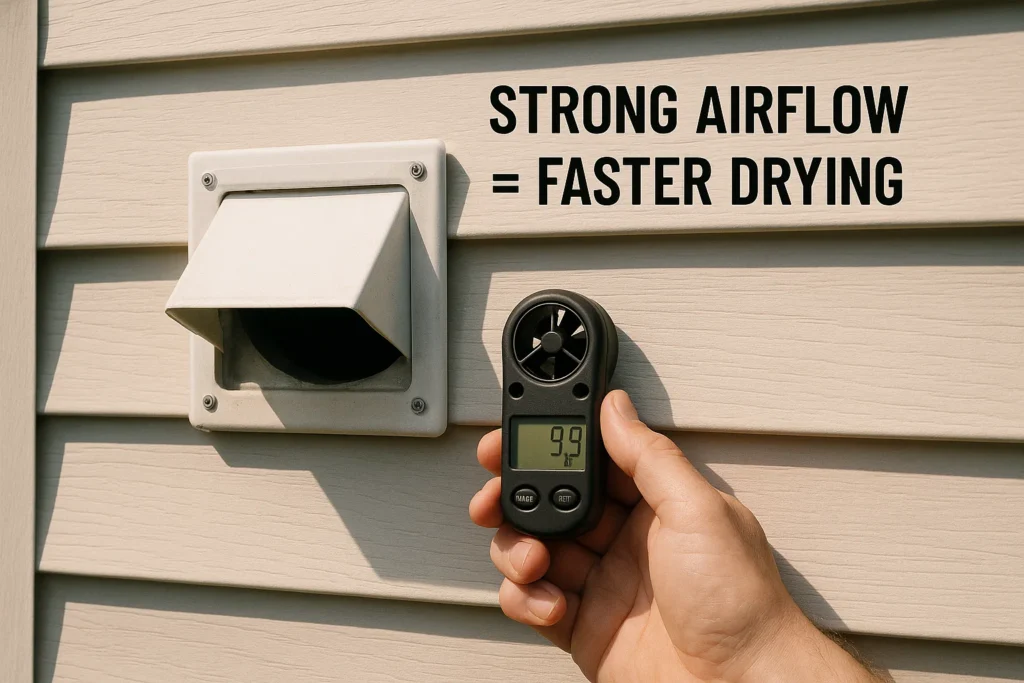
- Vent & airflow (dryers):
- Short, straight vent run is best; avoid crushed foil hoses.
- The outside flap should move freely; clean lint path for safety and efficiency.
- Short, straight vent run is best; avoid crushed foil hoses.
Bring measurements (and hallway photos) to the store. We’ll map machines that fit—and flag any hookup changes you’ll need on delivery day.

Top-Load vs Front-Load: which one’s right for you?
| Factor | Top-Load Washer | Front-Load Washer |
| Cleaning & fabric care | Great on everyday loads; agitator can be harsher on delicates | Excellent cleaning with gentler action; high-spin reduces drying time |
| Capacity & footprint | Similar width; some models slightly taller | Often larger usable drum per footprint |
| Water & energy use | Typically higher | Typically lower; faster spin = less dryer time |
| Vibration & noise | Usually milder; simpler suspension | Can vibrate more if unlevel; needs solid floor & leveling |
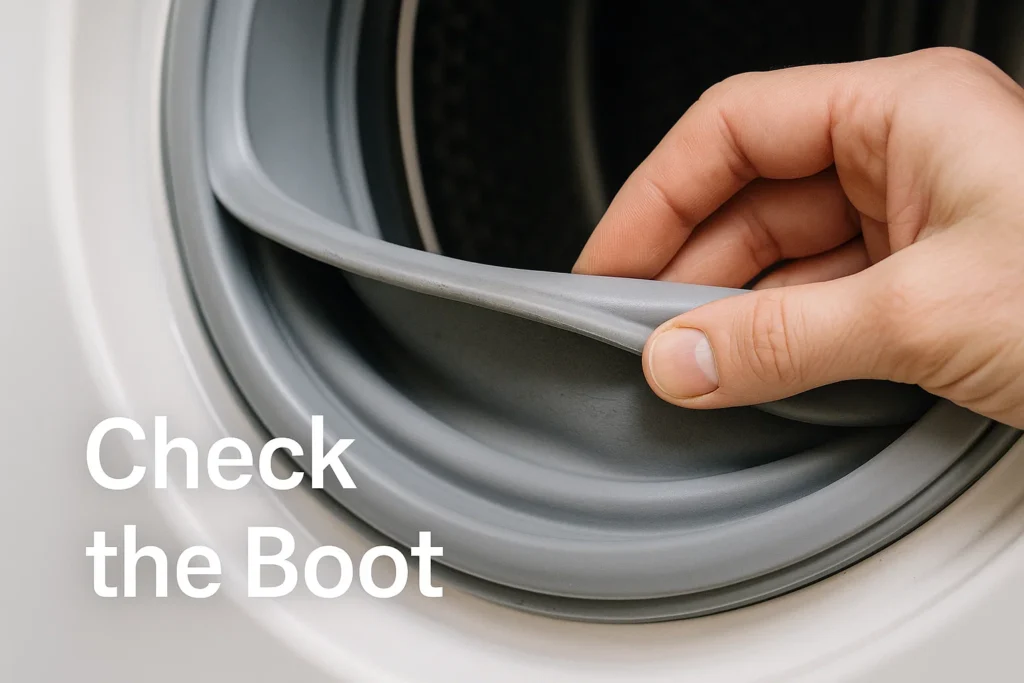
| Maintenance | Simple; fewer mold concerns | Keep door/boot dry, leave door ajar; periodic gasket clean |
| Price on used market | Often cheaper | Often pricier but still a value vs new |
| Best for | Quick everyday loads, garage/utility installs | Families, bulky items, energy savings, stacking with dryer |
Quick advice:
- Small household, simple laundry → Top-load is easy and durable.
- Bigger loads, better efficiency, stackable pairs → Front-load usually wins.
In-store inspection checklist: how to test like a tech
Washer (any style)
- Spin & suspension: Manually rotate the drum; listen for scraping. Push down front corners—excess bounce = weak suspension/feet unlevel.
- Bearings & noise: Turn the drum; rough grinding = bearing wear.
- Agitator/impeller (top-load): Check for cracks/looseness.
- Door boot/gasket (front-load): Inspect for mold/tears; gently pull the lip to check hidden grime.
- Fill & valves: Ask for a quick water fill demo; look for leaks at the hoses/valves.
- Drain & pump: Run a brief drain; listen for smooth pump sound, no rattling.
- Spin speed/vibration: On a quick cycle, check that it reaches spin and stays balanced.
- Hoses & clamps: Look for bulges, cracks, or rusted clamps.
- Cosmetics & odor: Interior should be clean; mild detergent scent is fine, musty isn’t.
Dryer (electric or gas)
- Heat & cycling: Confirm warm air at vent in 1–2 minutes; consistent cycling after warm-up.
- Airflow: With a vent test hood or even hand at outlet, feel strong flow; weak flow = lint path issue.
- Drum, belt & rollers: Spin by hand; listen for squeals or flat spots.
- Moisture sensor: Lightly damp cloth should extend cycle or register on sensor (if demo available).
- Lint filter & housing: Clean, seated filter; inspect cavity for heavy lint.
Repair vs replace: when does it make sense?
- Washer: If bearings are howling or control boards fail repeatedly, replacement may beat repair on older units.
- Dryer: Elements/igniters and belts are often economical; severe airflow issues can mask bigger problems.
Need an expert quote before you decide? Fair Appliance Repair Service can diagnose costs so you can compare repair vs replacing with a tested unit.
Delivery & installation (local checklist)
- Scheduling: Ask about same-/next-day availability; confirm time window.
- Stairs/long carry: Tell us upfront so we bring the right team and gear.
- Stacking kit: Required for front-load stacks; we’ll bring compatible hardware.
- Dryer vent & cord: We’ll match 3- or 4-prong cords and set up a safe vent path (or flag if your run needs work).
- Leveling: Critical for front-loaders—reduces vibration and wear.
- Old set: Ask about haul-away options and fees.
- Final check: Test for leaks, proper spin/heat, and good airflow before we leave.
Warranty & after-support
Get the warranty in writing: duration, what parts/labor are covered, and how to request service. Keep the receipt and model/serial numbers. Many “new machine” jitters are simple—leveling, door boot care (front-load), or vent kinks—so call us for quick fixes before assuming a big failure.
About the Author — Sayed Sadat
Sayed has 10+ years of installing and testing laundry appliances in Citrus Heights. He turns technician checklists into buyer-first advice so you can shop used with confidence. Need help choosing or stacking? Call or get directions—bring your hookup photos and we’ll walk you through it in-store.
FAQs
Gas or electric dryer—which is better?
Both dry well. If you already have a gas line and vent, gas can be cost-effective. If not, electric 240V is simpler to set up.
How do I prevent front-load odor/mold?
Use HE detergent, avoid over-soap, wipe the boot, and leave the door ajar between runs. Run a monthly tub-clean cycle.
Can I stack any washer/dryer?
Only models designed as a pair with a stacking kit. We’ll confirm compatibility in-store.
What capacity should I choose?
3.5–4.5 cu ft washes modest loads; 4.5–5.5+ cu ft is family-friendly. Dryers usually 7.0+ cu ft for bulky items.
Next steps (local & conversion-friendly)
Bring your measurements and hookup photos—we’ll match what fits, show you the tests, and set delivery.